In this series of ‘how to’ blogs, we take a dive into the technical and business aspects of our platform and how you can use them to grow your business as a VCO.
This week: we show you how a branded cloud solution can help to sell public S3 storage under your own brand and domain name.
The challenge
There are multiple S3 storage providers but not many of them allow you to offer services under your own brand and domain and your own price level for customers.
The solution
We offer a smart solution where you can create S3 storage for your customers which contains your domain and/or brand name.
Important note
In our VCO (virtual cloud operator) model you can set your own price for S3 object storage. Our platform allows any VCO to be flexible in pricing, even on a customer level.
Introduction
S3 is a massively scalable storage service based on object storage technology. It provides a very high level of durability, with high availability and high performance. Data can be accessed from anywhere by using external tools.
Check this interesting article on how it all started: How Amazon’s S3 jumpstarted the cloud revolution.
S3 storage has a great advantage over file storage and also has a more interesting use model. You don’t pay for unused storage. For technical advantages over file storage read this article.
What we offer
With our in-depth knowledge of storage and a good understanding of what our customers need, we have introduced publicly available S3 storage to our VCOs a few weeks ago.
Previously it was a hassle to configure every single S3 address for VCO customers. In our new simplified approach we introduce a way to offer S3 connection URLs which show your brand and which are easy to create within a few clicks.
The details
In detail the scenario is as follow:
- you can configure a domain to be used for S3 connection URLs, like storage.yourdomain.com
- this domain needs to be verified in the VCO portal based on your DNS settings.
The DNS settings need to be done once and after that, you can create S3 objectspaces with any name you want. For example: mybucket.storage.yourdomain.com
VCO customers can even create their own S3 connection URLs.
On VCO level
As a Cloud administrator you will be able to set a subdomain and domain to be used as a starting point for all S3 connection URLs. We advice you to only use the format subdomain.yourdomain.com for configuring the base settings for S3.
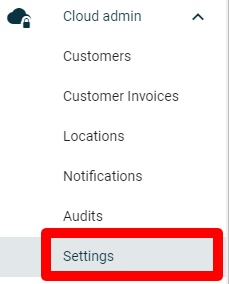
To start with the configuration select Settings under the Cloud admin menu on the left.
This will open the following screen.
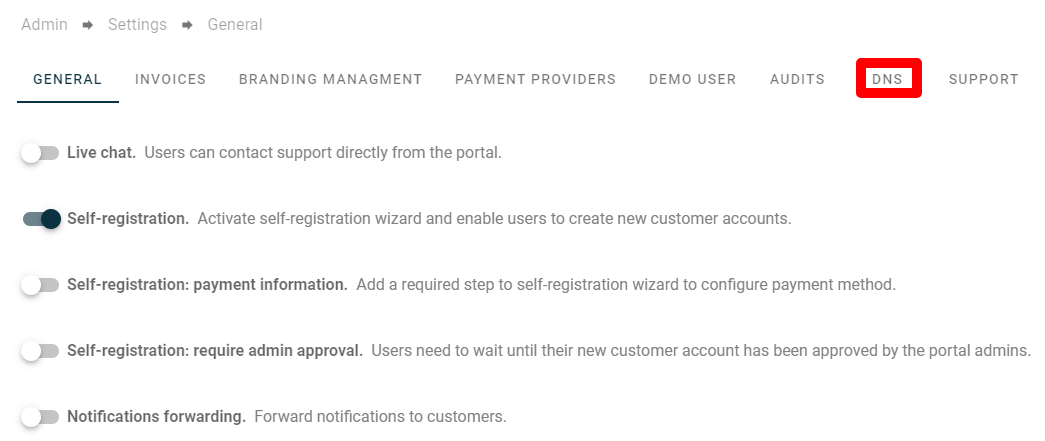
Select the DNS tab to open the settings for DNS.
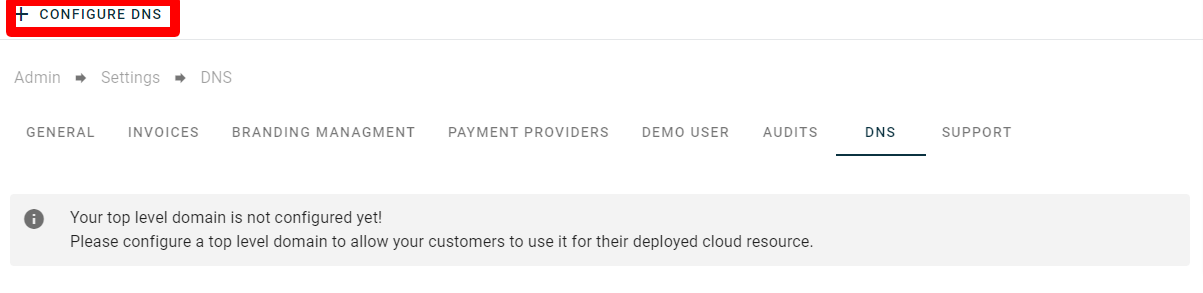
By clicking Configure DNS as a VCO you will be able to configure a domain for use with S3. In this case I used one of my private domains and entered a subdomain.
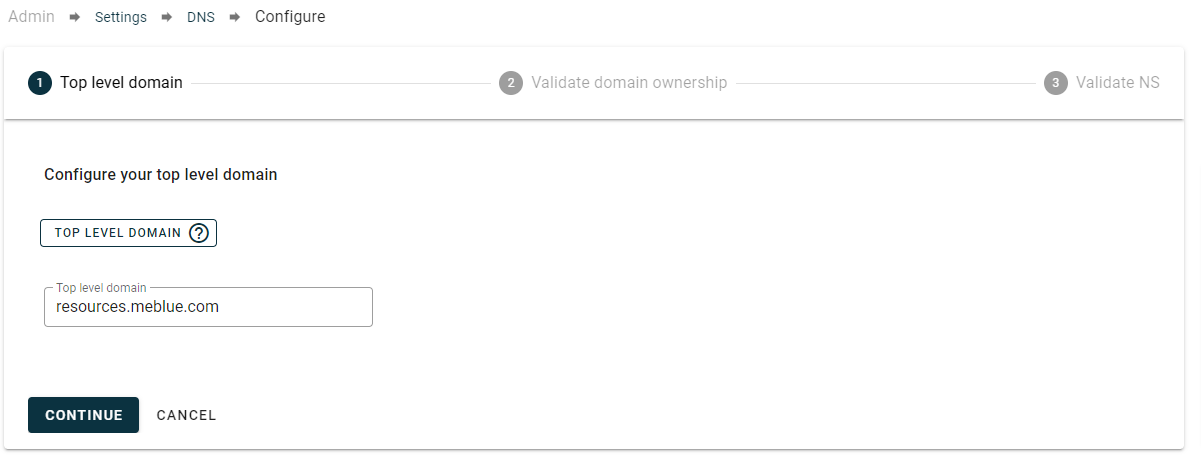
Click continue to confirm the domain to use. Again, we advise to use a subdomain. In the next screen we will present the DNS settings that you need to use.
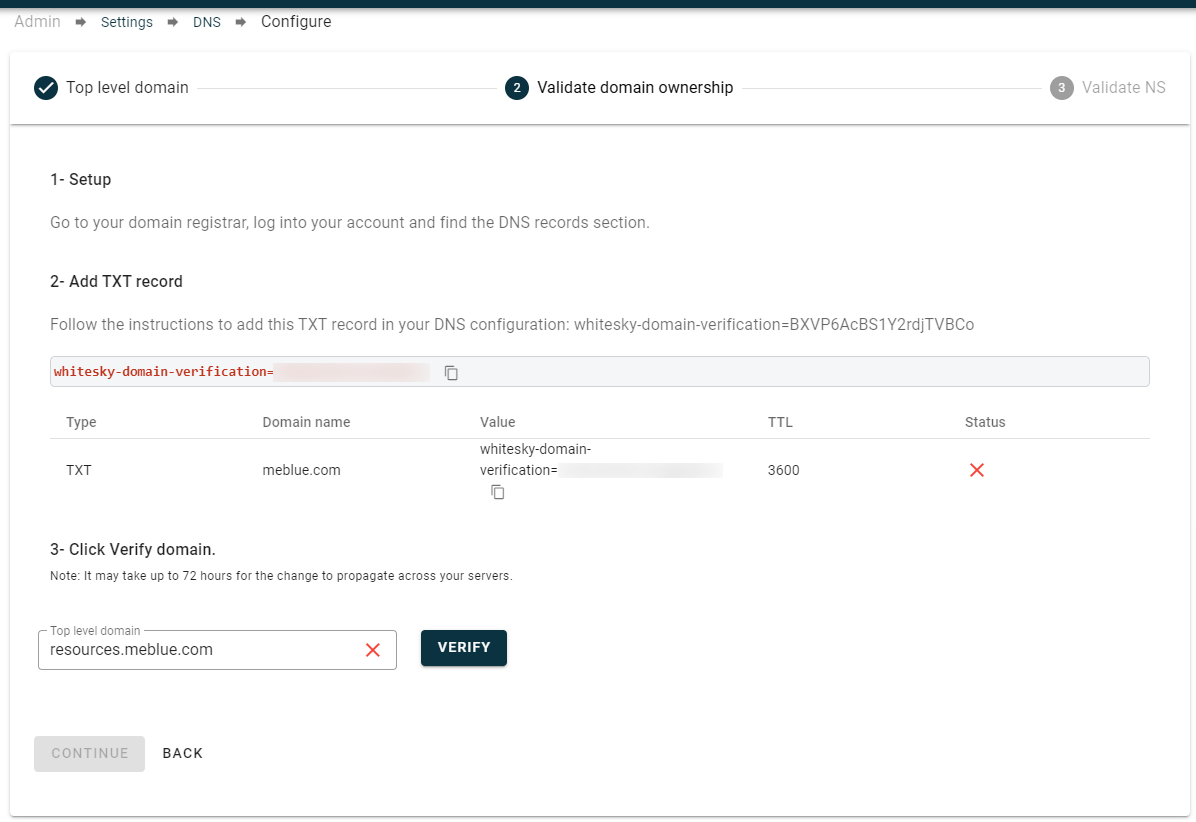
In your DNS you need to set a TXT record. Below you can see how this is done in Transip. Make sure to keep your DNS records open while trying to verify details. We will need additional DNS settings in a later stage.
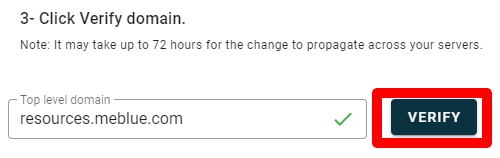
If the DNS record is added make sure to get back to your cloud portal and click Verify. If verified there will be a green checkmark behind the domain. Click Continue and the following screen will appear.
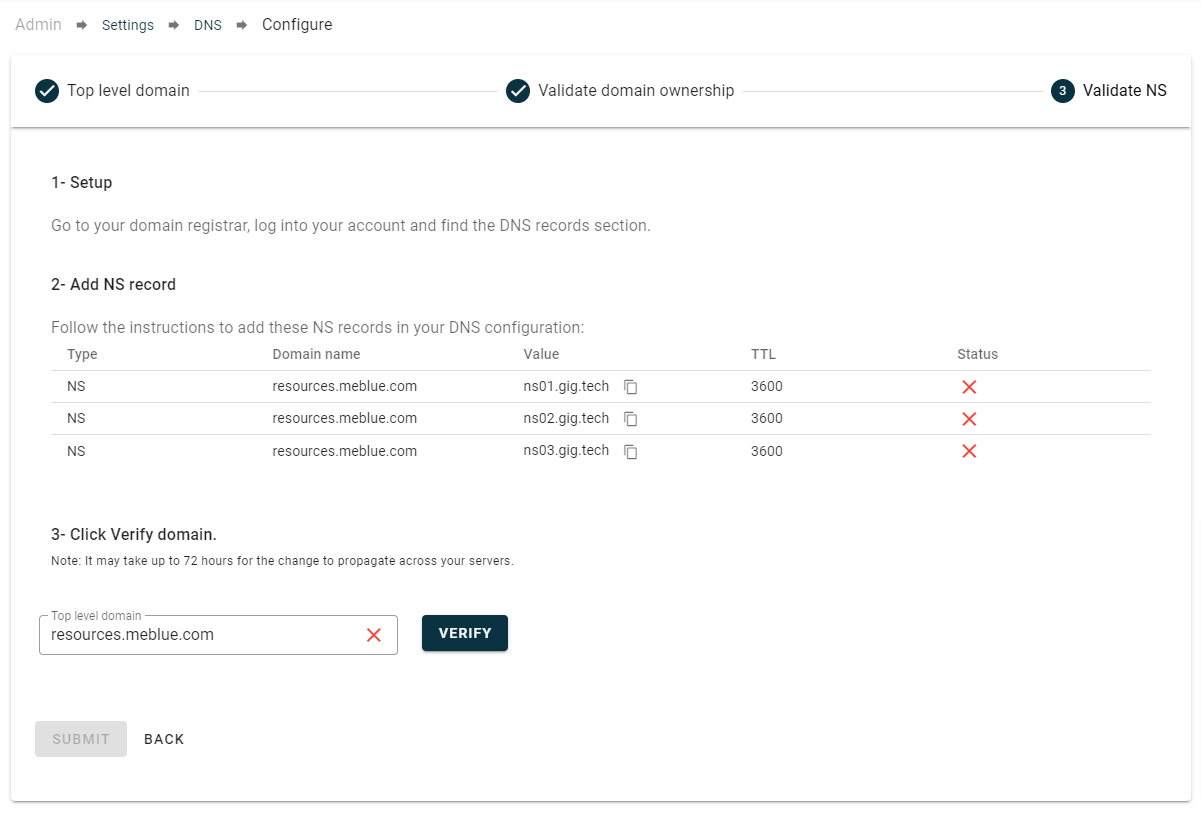
Make sure to add these NS records to your DNS. In this case the name for the record needs to be resources. An NS record tells the Internet where to find a domains IP address. On Transip it looks like this:

If the DNS records are added you can click Verify in the portal.
When done, click Submit to get everything set. The domain that you added will now be available to your customers when creating public S3 objectspaces. Your customers can even add their own domains if they like. However, they will be charged for a public IP.
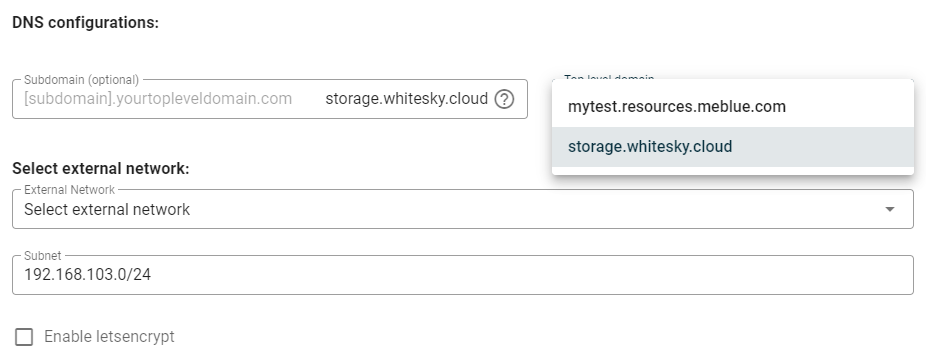
How to pick the domain during creation of a public S3 objectspace
When creating a publicly available S3 you can pick under which subdomain it needs to be created. See the below screen.
If you are unsure how to set this all up, please contact our A-Team.