In this series of ‘how to’ blogs, we take a deep dive into the more technical aspects of our platform and how to use them.
The problem
From a customer’s perspective it’s not always clear which tools work with non AWS S3 object storage.
We’ll take a deep dive into this topic in order to shed some light on this for those users to whom it isn’t quite clear how this third party tool works.
The solution
We’ll explain how you can use the Cloudberry S3 tools to copy/move data from your Windows machine to our S3 compatible object storage. As not all of our users have the same level of technical knowledge as DevOps, we won’t use commandline. Instead we’ll keep it simple.
Note
There is a great collection of S3 tools available on the market. In our blog series we pick the solutions that we have tested with our S3 Objectspace.
Before you begin
Make sure to download the Cloudberry Drive tool for Windows. Follow the setup to install the solution on your Windows machine.
Configure an S3 Objectspace in whitesky.cloud
The first thing we need to do is to create an S3 Objectspace in whitesky.cloud’s cloud.
Prerequisite
An Objectspace needs a Cloudspace. We have some technical information available in our portal.
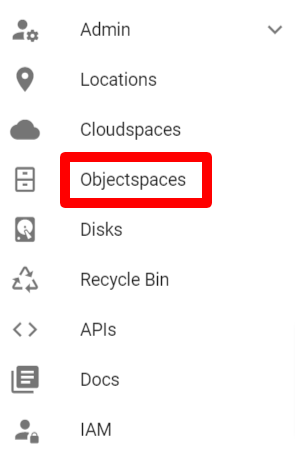
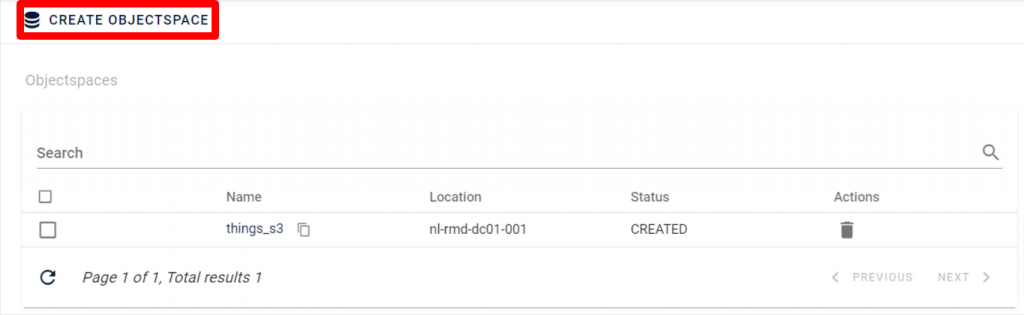
On the left side of the portal pick the Objectspaces option.
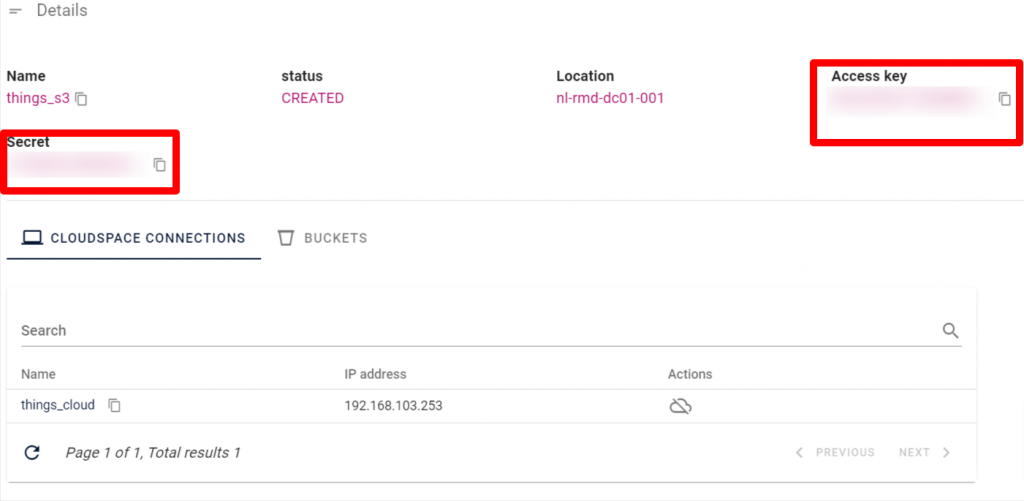
On this page you’ll find the currently existing S3 Objectspaces. As you can see I have created one Objectspace called things_s3. The next step is to create a new objectspace.
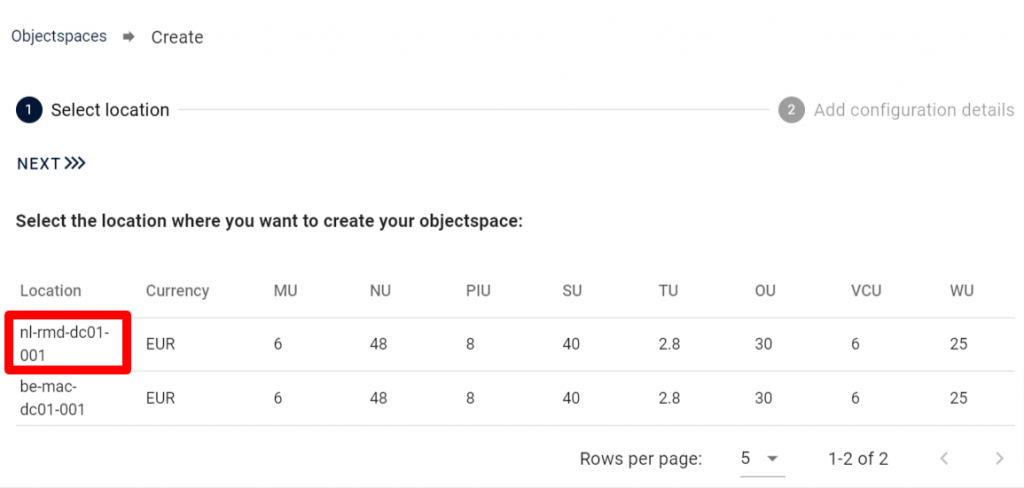
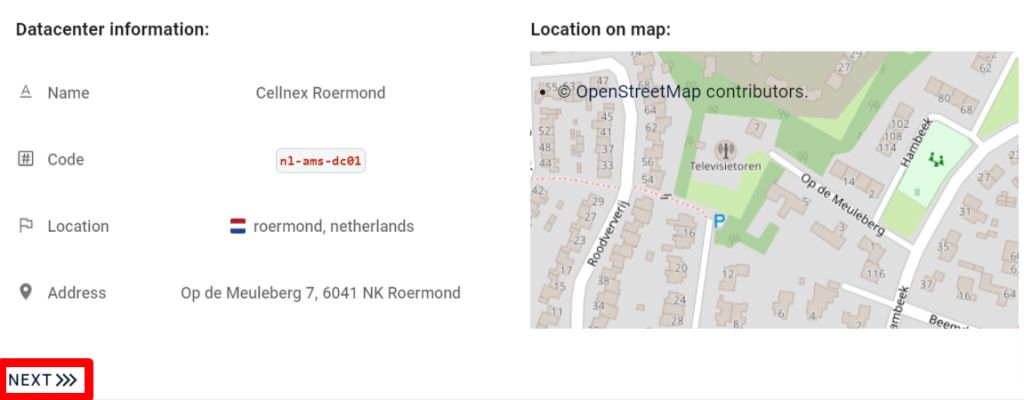
First up, you’ll have to choose the location, this is the data centre which runs our cloud solution. In this case we picked the nl-rmd-dc01-001 location which is in Roermond, the Netherlands. After picking the location you will see some info regarding this location.
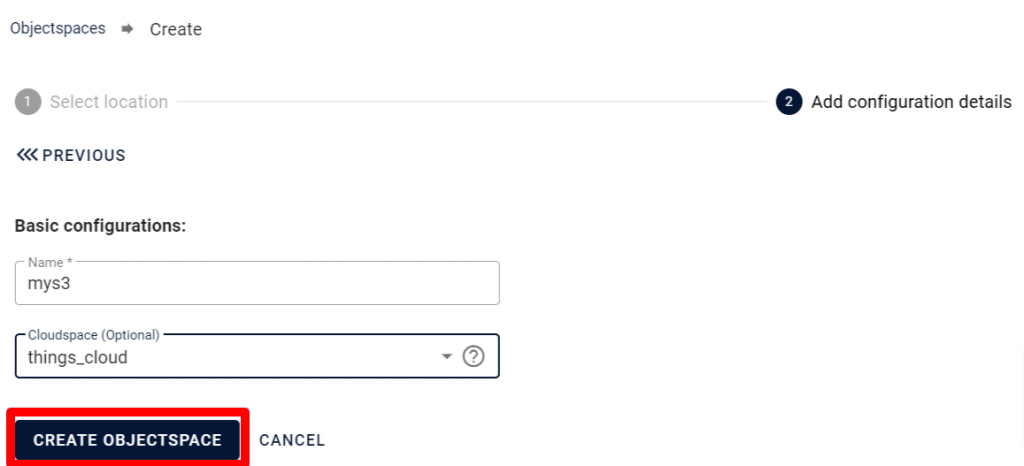
Once you’ve confirmed the location, there are two things left to decide:
- Name
- Cloudspace
Once you’ve chosen those, you can create the Objectspace. It might take a bit of time before it’s ready to go.
In order to use the Objectspace later on, make sure to copy both the Access key and Secret. You’ll need those to configure the Cloudberry Drive later on.
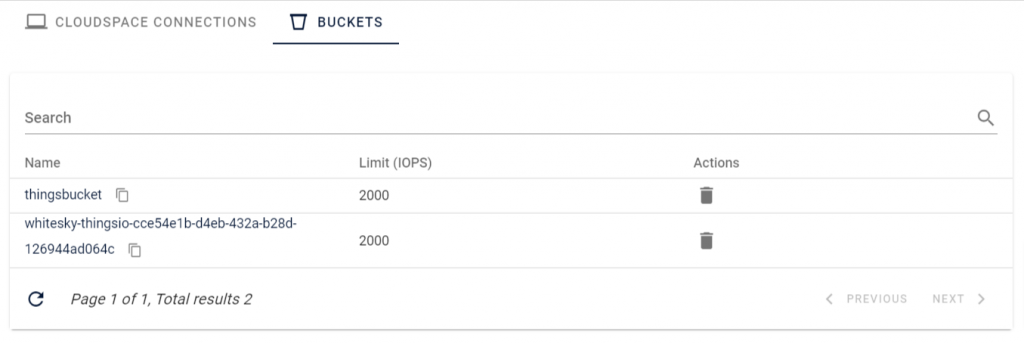
Next up you can create buckets inside the S3 Objectspace. For each bucket, you’re able to decide a specific IOPS (input/output operations per second) setting. Sometimes you simply want to limit speeds. You’ll be able to change this setting later on.
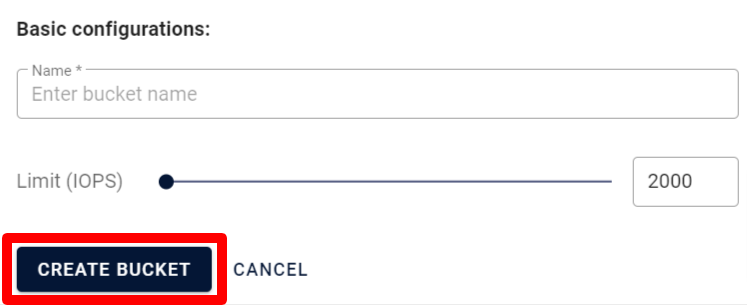
Now choose add a bucket, you’ll need to select/enter two details:
- Name
- Limit (IOPS)

Create reverse proxies to link the S3 Objectspace to your domain
In order to use the S3 Objectspace with Cloudberry Drive you’ll need to use reverse proxies.
These proxies ensure the S3 Objectspace can be accessed from a domain. The Objectspace will be secure because it’s protected by the Access key and Secret which you previously configured.
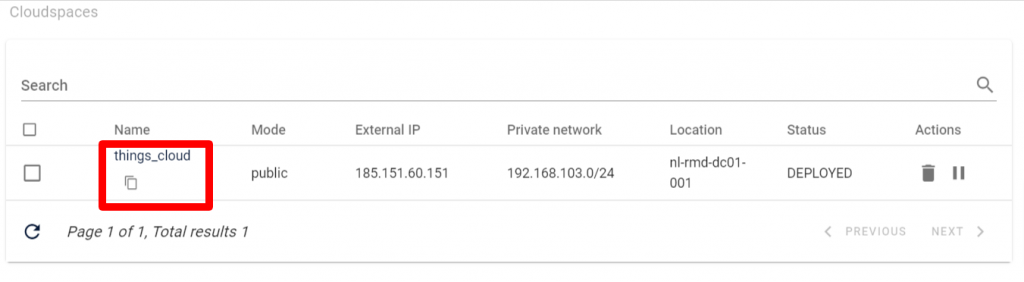
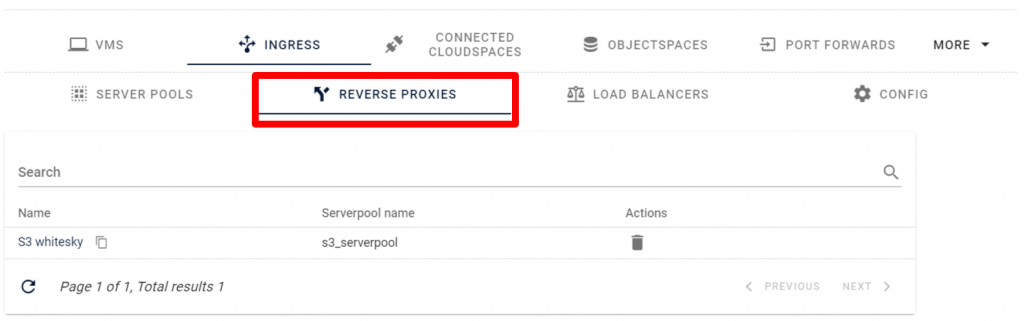
You can create a reverse proxy by selecting a Cloudspace in the Cloudspaces tab. In this case we’re using a sample Cloudspace called things_cloud.
You’ll now be on the Cloudspace details page. Select the ingress and then the server pools tab.
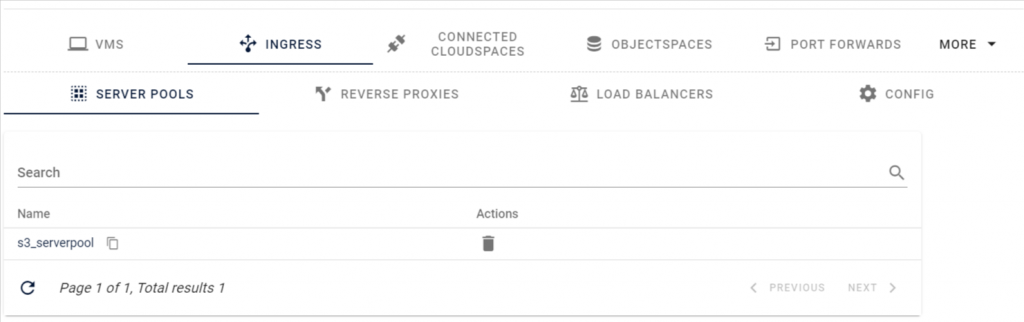
From the top navigation, select create server pool, this is needed to create reverse proxies.
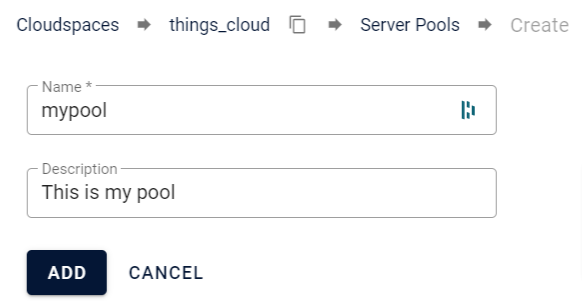
Provide the following details:
- Name
- Description
After creating the server pool, you’ll create a link between the serverpool and the Objectspace.
Click on the server pool and the following screen will appear.
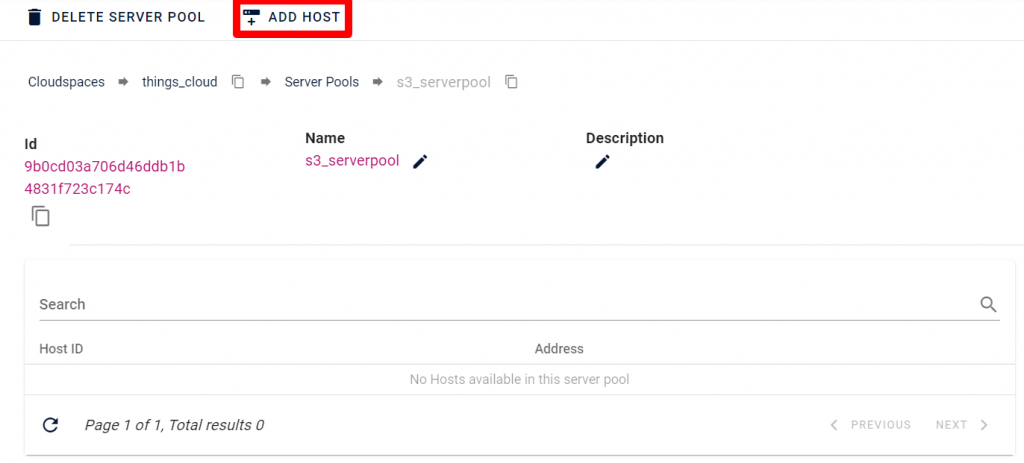
Click add host to link the Objectspace to the serverpool.
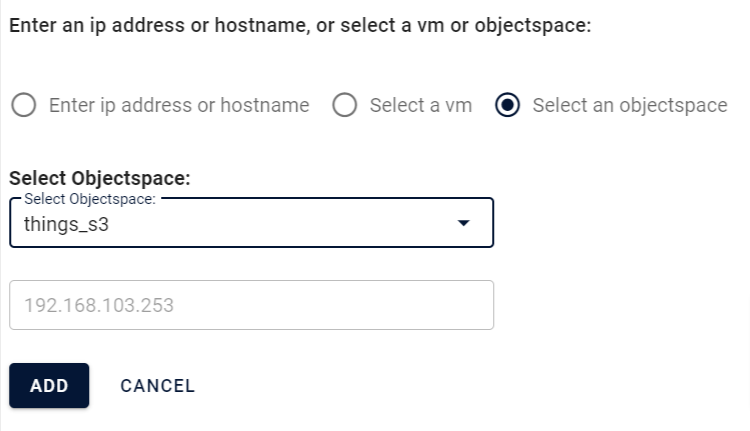
Select the radio button select an Objectspace, pick the Objectspace and click add. Voila, you have linked the Objectspace to the serverpool.
After linking the serverpool with the Objectspace, you’ll create the reverse proxy. Choose reverse proxies and then create reverse proxy.
Take a look at some settings for our reverse proxy.
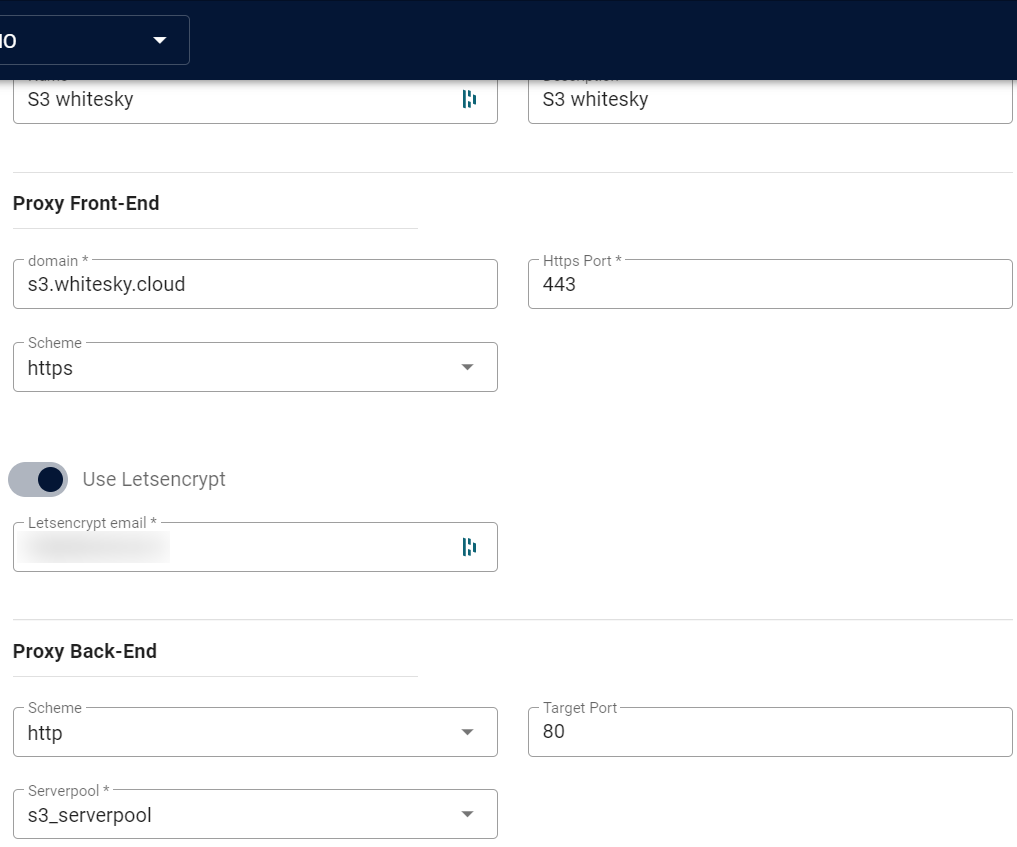
ATTENTION: Check the DNS settings for your domain before commencing. Sometimes it takes 24 hours to process.
Make sure to configure HTTPS and use Letsencrypt. Don’t forget to provide your email address. Also select the serverpool you have previously created.
Once this has been created you are ready to configure it in your DNS. (This could take some time)
You’ll basically create a subdomain in your DNS which points to the public IP address of the Cloudspace with an A record.
The public IP address can be found in the Cloudspace settings.
Setup the S3 Objectspace in Cloudberry Drive
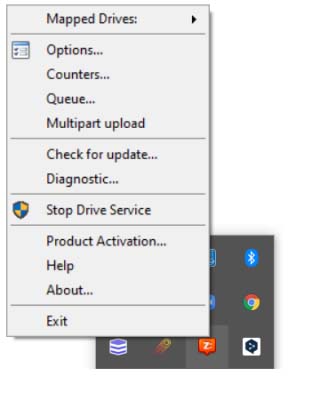
You gain access to the drive options in the Windows taskbar. Choose options.
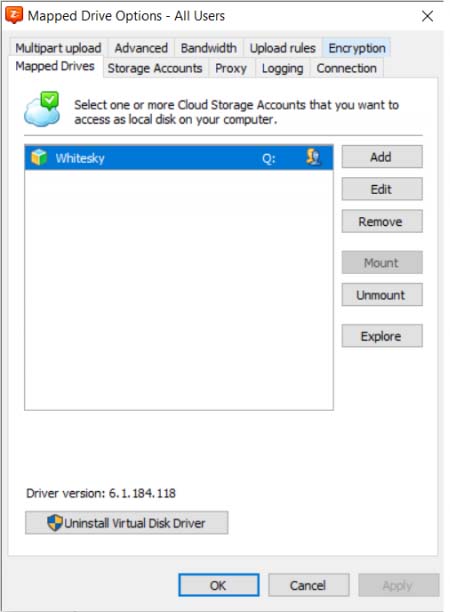
You can see we already configured a storage provider. Let’s add a new one linking it to your S3 Objectspace.
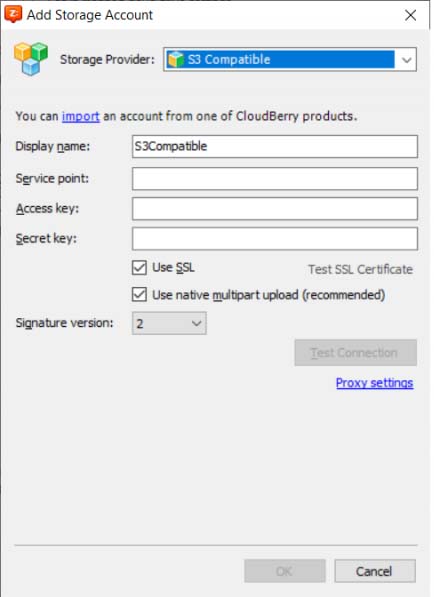
Select S3 compatible Storage Provider in the settings screen. Fill in all the details of your S3 Objectspace and make sure the Service point contains the details you used in your DNS.
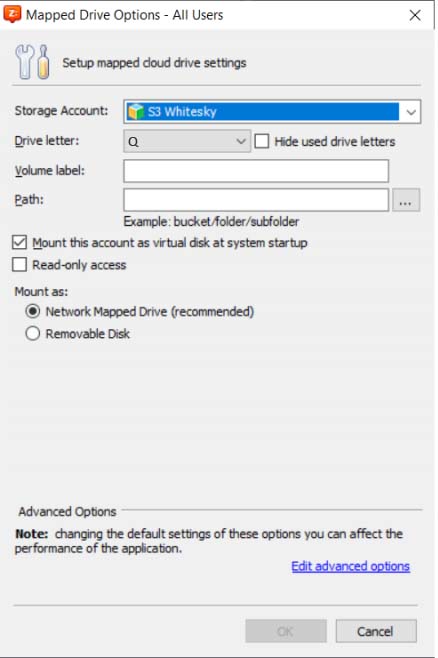
After adding the storage provider, you will come back to the Mapped Drive Options screen.
Select the newly created Storage account, the drive letter and some optional parameters. Click ok to mount the drive for use in Windows Explorer. In our case it’s been mounted onto driveletter Q.
You’ll now be able to put files into your S3 Objectspace.

Tip
You can now upload an .ova file to your S3 Objectspace and create a VM from that file. See ‘How to create a VM from a Bitnami stack‘ for more information.